前回、After Effects と Lottie のシリーズとして、After Effects で Bodymovin プラグインを使用したページロードのアニメーションを作成しました。このチュートリアルでは、このアニメーションをプロジェクトに追加して、画面に表示し、ページの読み込みが終了したら消えるようにします。

このレッスンでは

  1. Lottie アニメーションをプロジェクトに追加する
  2. トリガーを設定する
  3. アニメーションが消えるように設定する

について説明しています。

1.Lottieのアニメーションをプロジェクトに追加する

LottieのアニメーションをAfter Effectsからエクスポートし、Webflowのプロジェクトにアップロードする必要があります。私たちは、Bodymovin を使ってアニメーションをエクスポートしました。この方法は、チュートリアルのステップ 3 と 4 で説明しています。

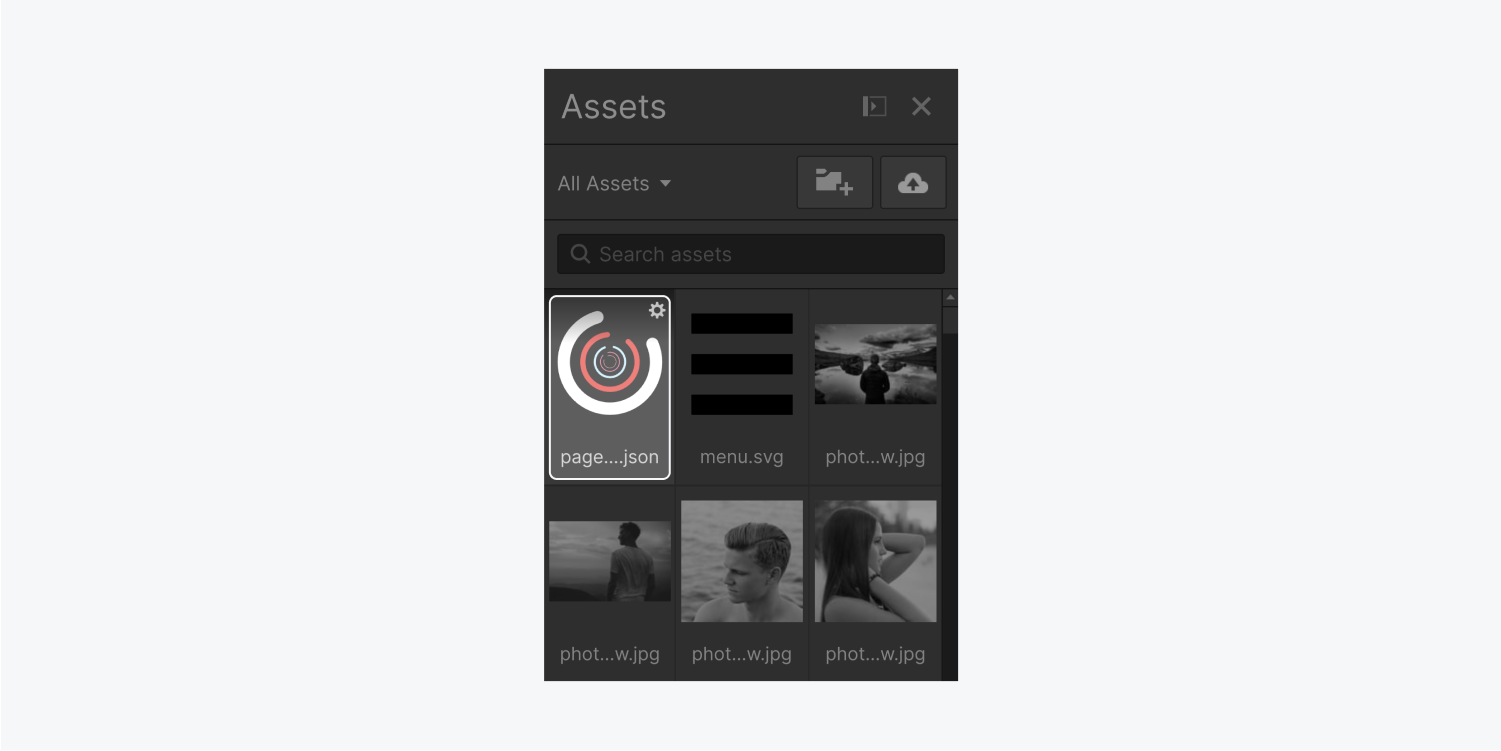
アニメーションを探して追加するには、左のツールバーから資産パネルの写真アイコンをクリックし、アニメーションをページの上部にドラッグします。

The .json asset is highlighted on the assets panel. There are five other assets in the panel.

アニメーションをループさせるには、「Lottie Animation Settings」ポップアップの「Loop」にチェックを入れます。

The lottie animation settings panel displays a replace lottie sequence button, a preview window, a preview animation button, a check box for use built-in duration, loop and play in reverse. It also displays an input field for the use built-in duration. Below are two options for Render, SVG and canvas. At the bottom there is a show all settings button.

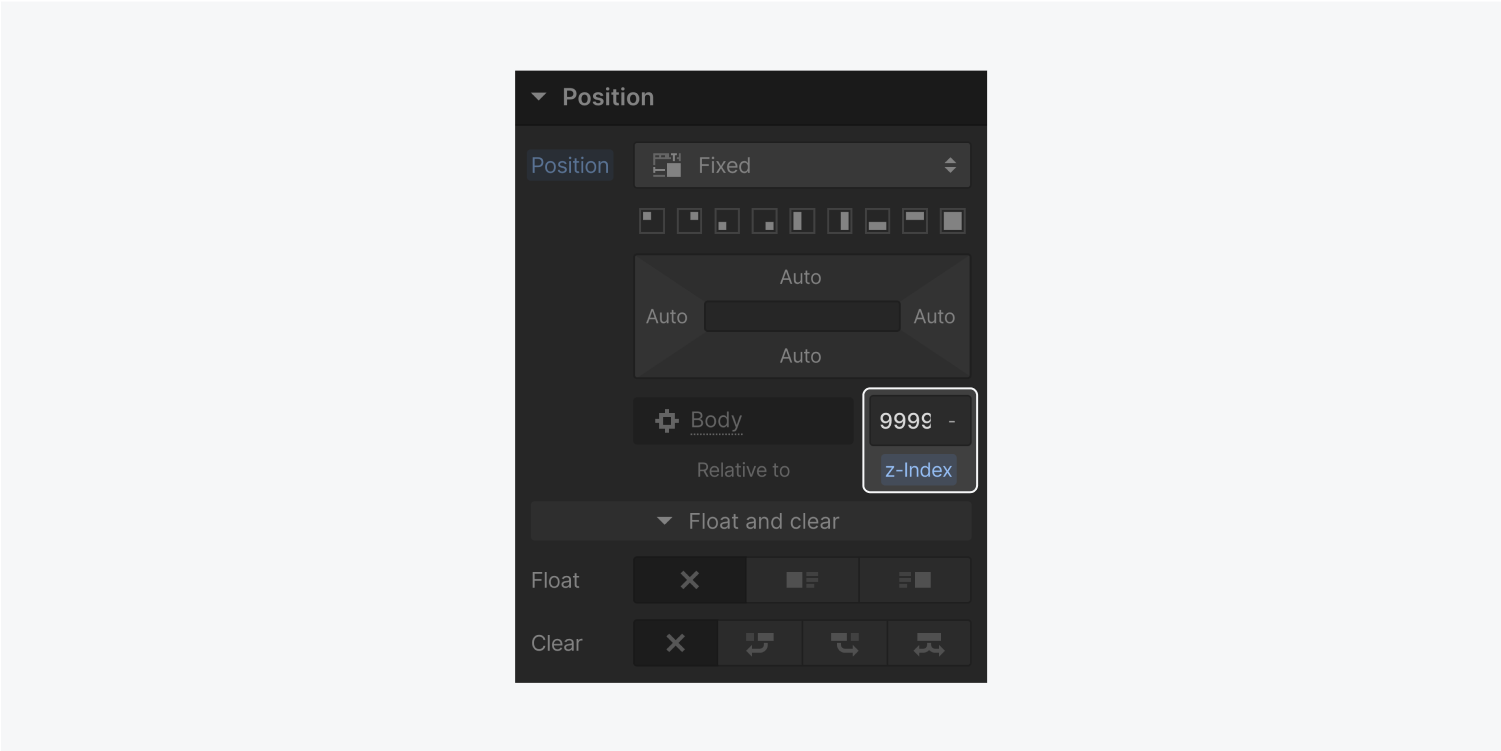
設定を閉じて、右側のスタイルパネルで、「位置」の隣にあるドロップダウンメニューから「固定」を選択します。これで画面上のアニメーションの位置が制御されます。

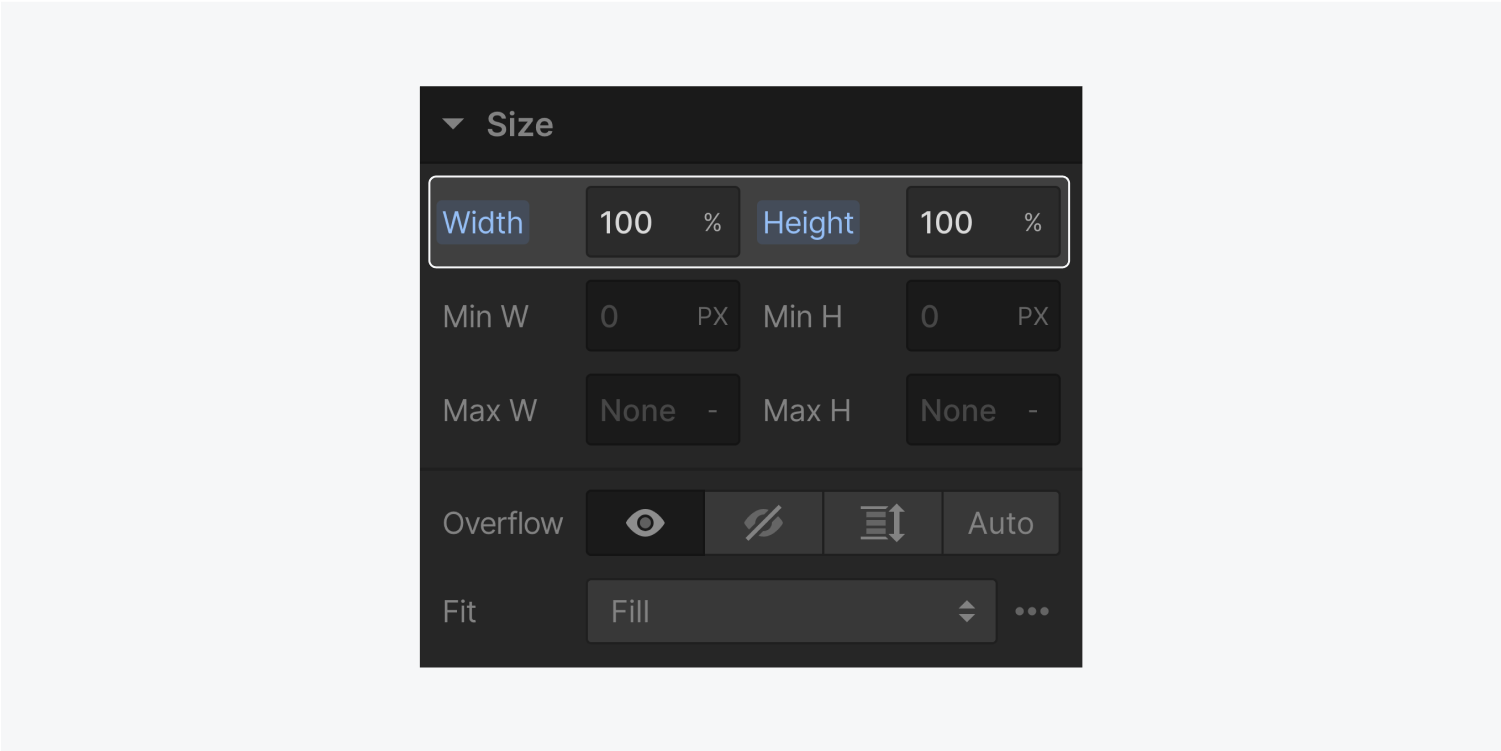
「サイズ」で、幅と高さを100%にします。

The size section in the style panel displays a width of 100% and a height of 100%. These are highlighted on the panel.

「位置」で、z-index(積み重ねの順序)を高い数値(例えば9999)に設定します。これにより、アニメーションは常に一番上に積み重なるようになります。

The z-Index input field with 9999 entered is highlighted in the position section of the style panel.

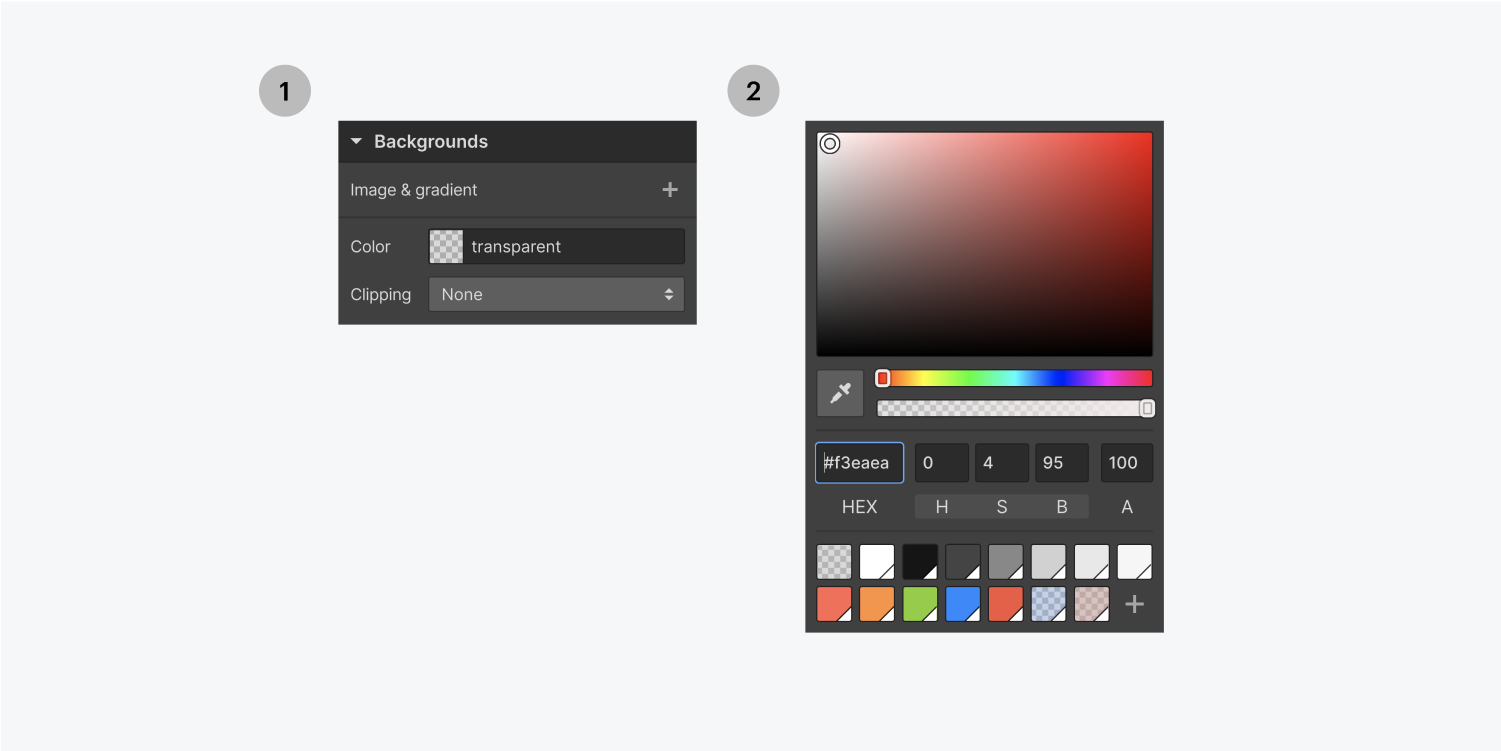
アニメーションの背景が透明である場合、背景色を追加することもできます。

Step one on the left select the color button to open up the color picker, step 2 on the right, select the background color of your choice.

素晴らしい では、ページの読み込みが終了したら、アニメーションを非表示にするトリガーを設定しましょう。
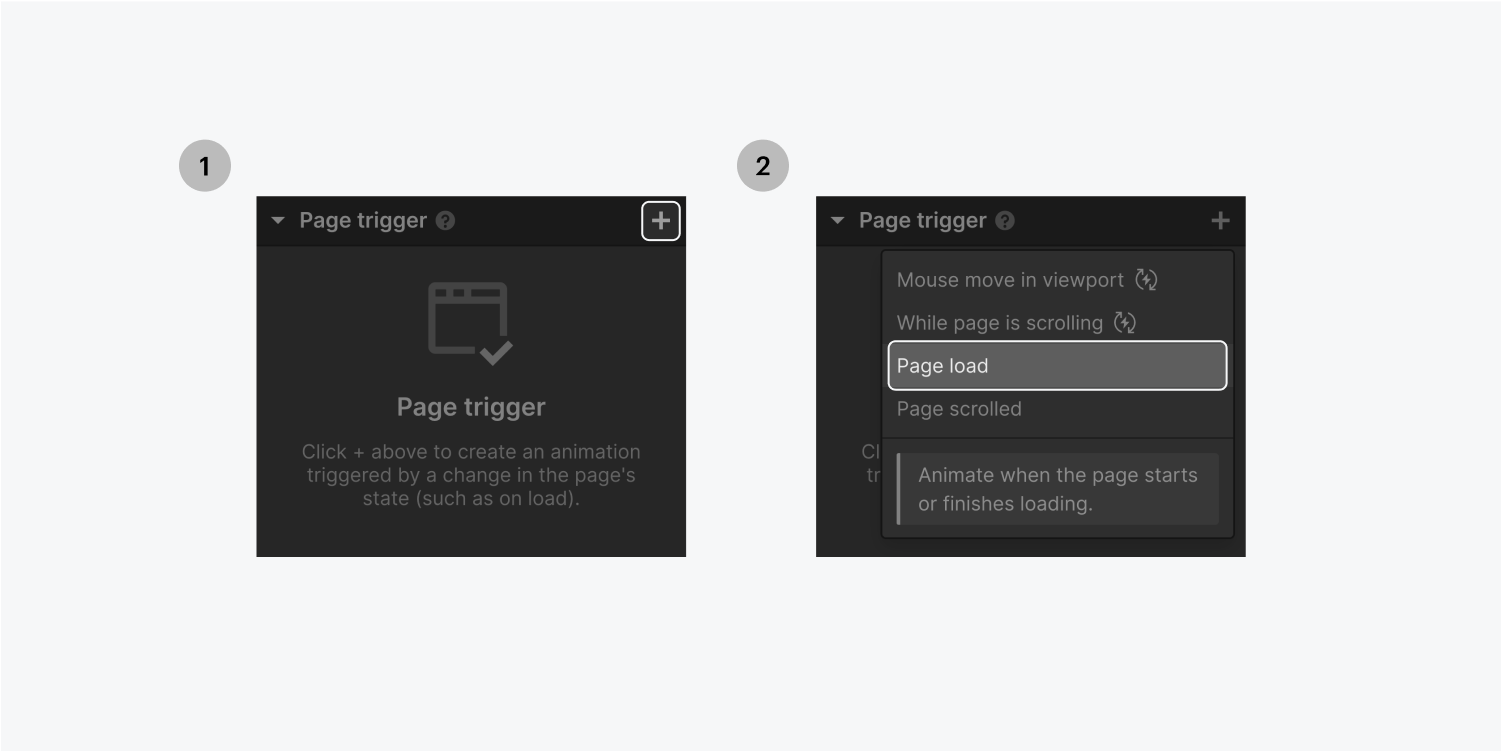
2.トリガーを設定する

Interactionsパネルで、Page triggerの隣にあるプラス記号をクリックし、ドロップダウンメニューからPage loadを選びます。

Step one on the left, click on the plus sign on the Page trigger section. Step two on the right, click on the Page load option on the dropdown menu.

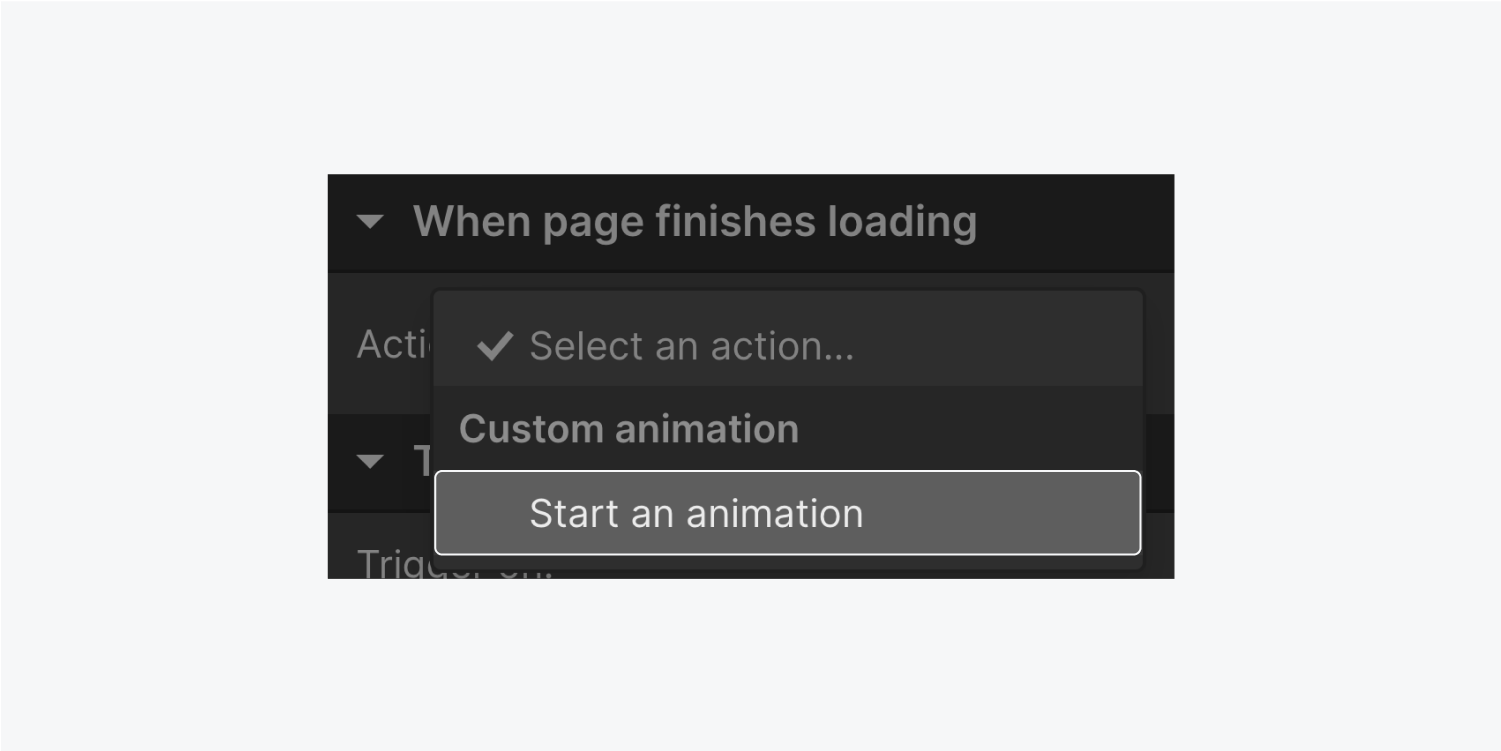
ページの読み込みが終了したら」で、「アクション」メニューから「アニメーションを開始」を選択します。

The When page finishes loading has a dropdown menu open for the action selection. There are 2 options, custom animation and start an animation which is highlighted.

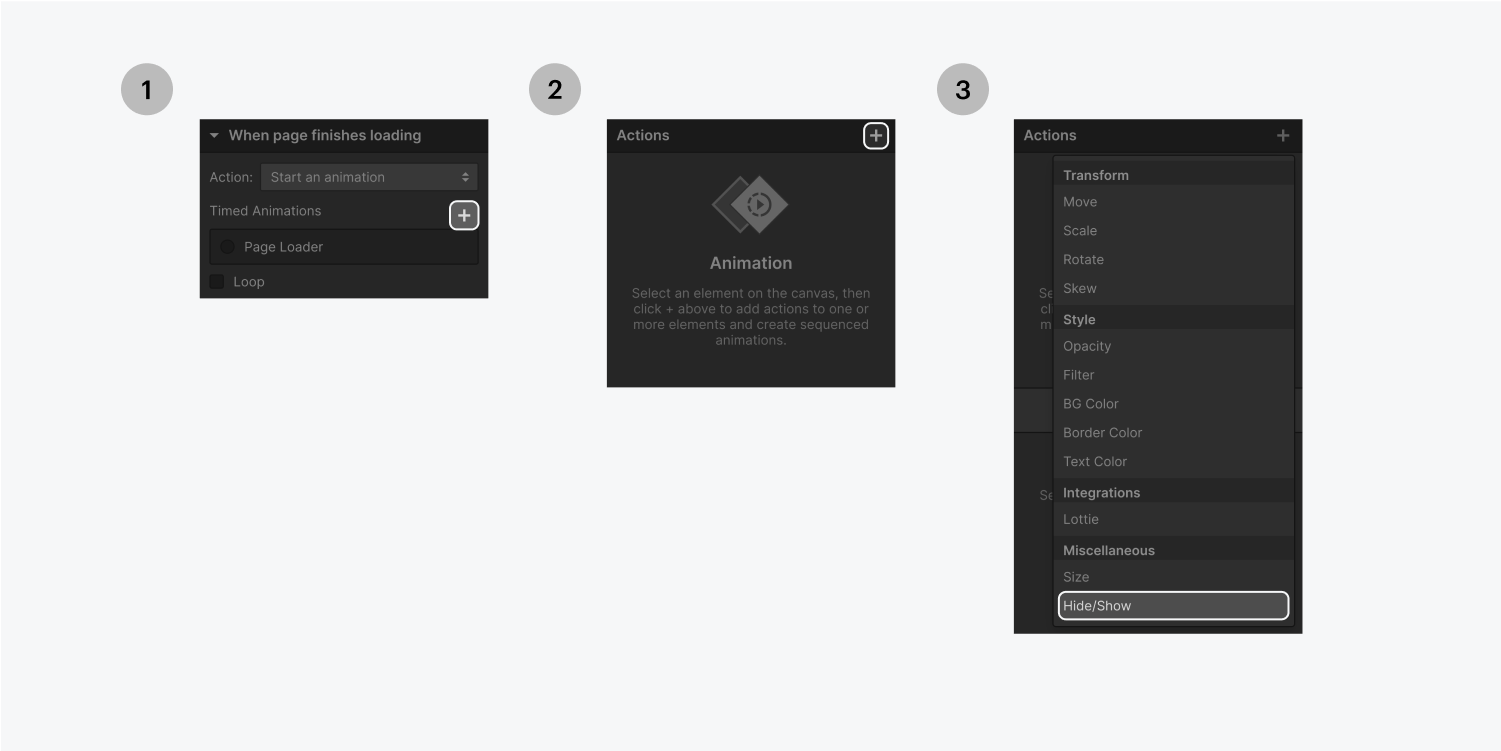
整理整頓のために、「時間指定アニメーション」の隣にあるプラス記号をクリックし、アニメーションに名前を付けます(例:Page loader)。

次のステップでは、ページが読み込まれるとアニメーションが非表示になるように、Interactionsパネルに留まります。

3.アニメーションが消えるように設定する

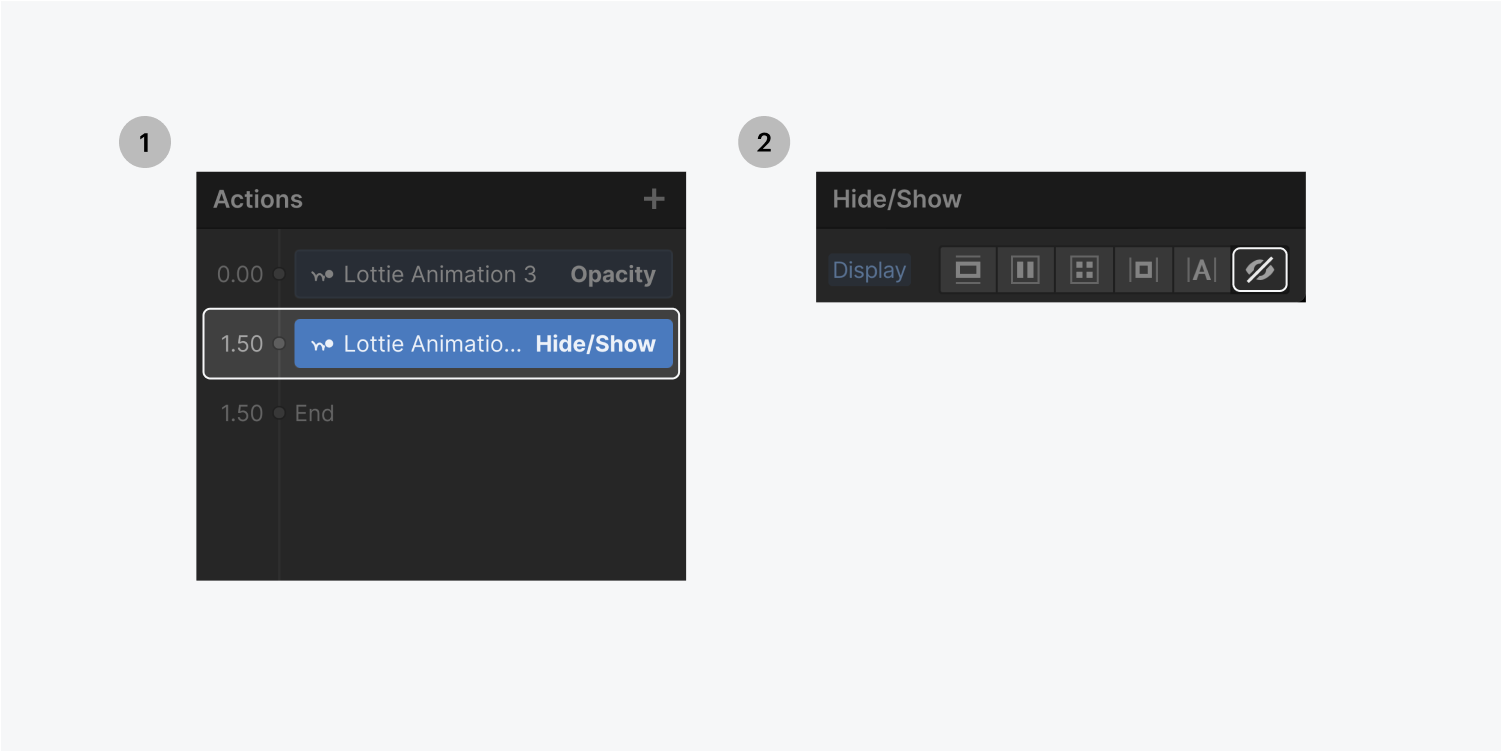
インタラクションパネルで「タイムド・アクション」の横のプラス記号をクリックし、ドロップダウンメニューから「隠す/表示」を選択します。

Step one on the left, select the plus sign on the Timed animations section. Step 2 in the middle, select the plus sign on the actions bar. Step 3 on the right, select the Hide/Show option from the Miscellaneous section in the actions dropdown menu.

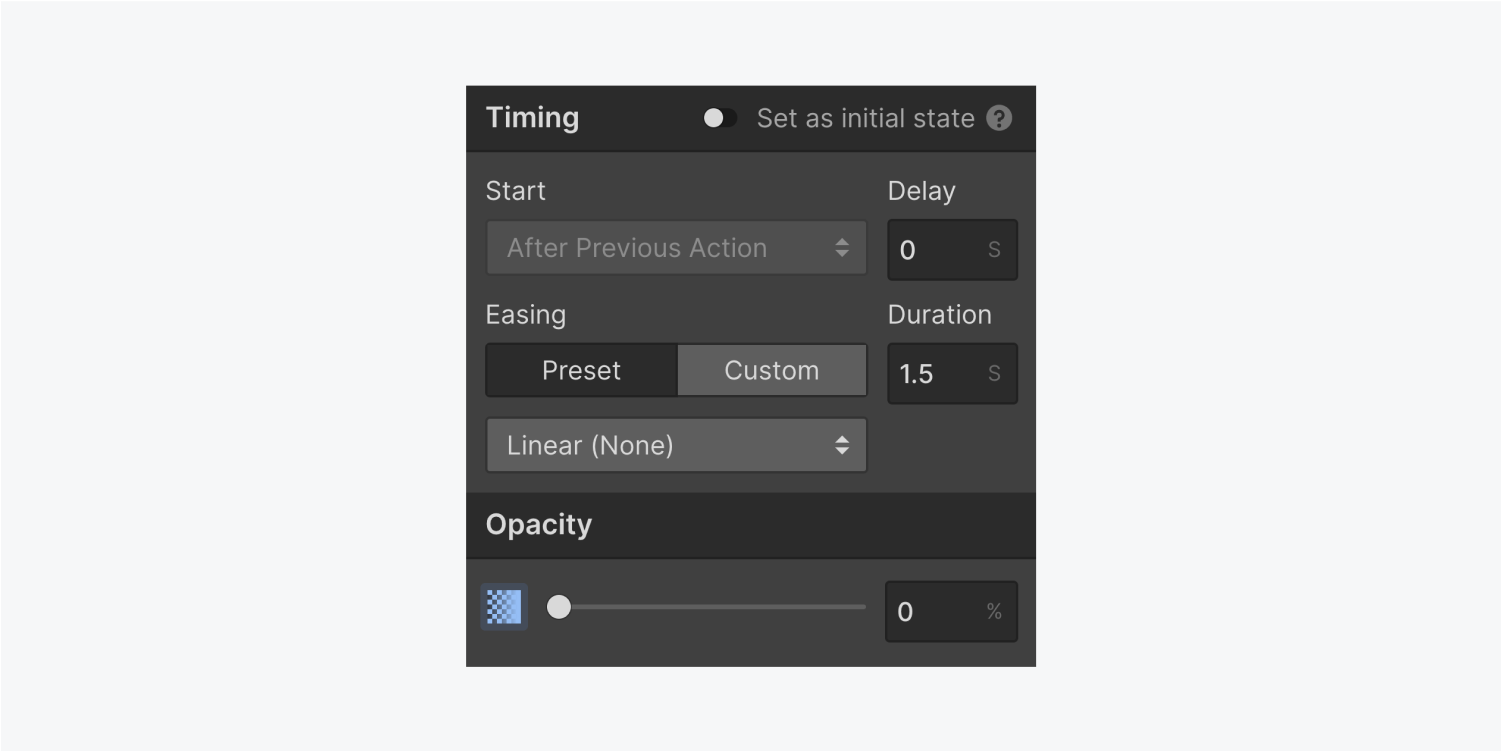
[表示/非表示]で[表示]を[なし]に設定します。

The Hide/show displays the 6 display options. The none option is highlighted.

「時間指定アクション」で、タイムライン上の「0.00秒」をクリックし、ドロップダウンメニューから「不透明度」を選択します。

Step one on the left, select the 0.00 time code. Step two on the right, select the Opacity action from the dropdown menu.

「不透明度」を0に、「継続時間」を1.5秒にスクロールして、アニメーションをフェードアウトさせます。

The timing settings panel displays a radio button to set as initial state, a start drop down menu with a delay input field, an easing duration and two settings with a type of ease dropdown menu. The opacity section includes a slider to increase the percentage.

[タイムアクション]で、タイムライン上の1.5秒にある「Lottie Animation」をクリックし、[表示/非表示]で、その表示設定を「なし」に設定します。

Step one on the left click on the action at the 1.50 timecode, step two on the right, select the none display setting on the Hide/show settings panel.e

プレビューモードで作品を確認し、値を微調整したり、アニメーションを調整したりして、デザインするページにちょうど良い状態にします。